¶ 8. New device
Application: Portal Nomid MDM
Document: V1.0.3
Last updated: 10/07/2026
Editorial owner: Nomid MDM Documentation
Last editorial review: 10/07/2026
Editorial language: en-US
The New device wizard prepares a device for provisioning and provides the resources required to start enrollment. The available flow depends on the device type: fully managed company-owned Android, personal Android with a work profile, or a Pico VR headset.
Important: Before generating any enrollment resource, confirm the company, policy, and management type. The screenshots in this article use a test account; in production, enrollment QR codes, links, and tokens must be treated as credentials.
¶ Prerequisites
- Have a policy compatible with the type of device being provisioned.
- Confirm that the policy is published and ready for use.
- For Android Company, prepare Wi-Fi or mobile connectivity for initial setup.
- For Zero-touch or KME, complete the corresponding integration first.
- For Pico VR, prepare NOPS on the workstation used for provisioning.
¶ Open the wizard
¶ From the Devices menu
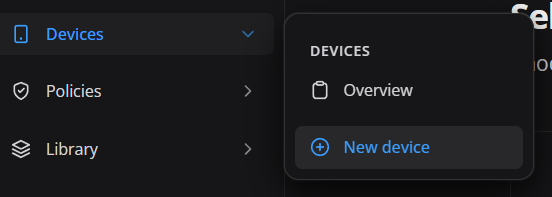
Open Devices in the side menu and select New device. Use this route when the task starts from fleet operations.
¶ From the global shortcut
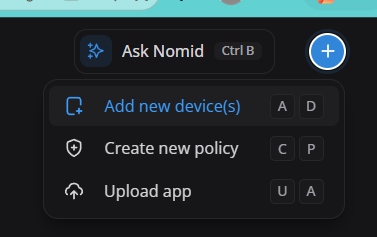
Open the global + button and select Add new device(s). The shortcut may also display the keyboard combination available in the interface.
¶ From a policy
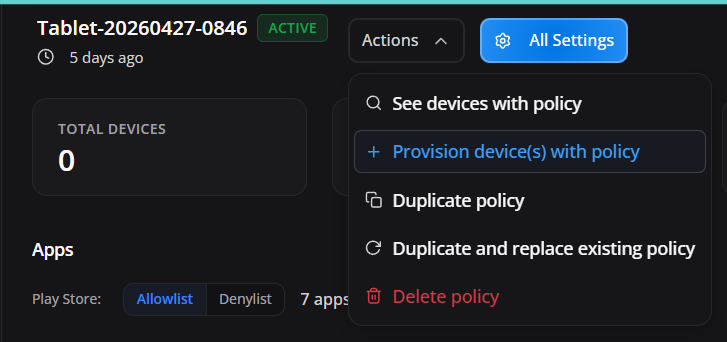
Inside a policy, open Actions and select Provision device(s) with policy. This route starts the wizard from the open policy and reduces the risk of selecting a different policy by mistake.
¶ Choose the enrollment type
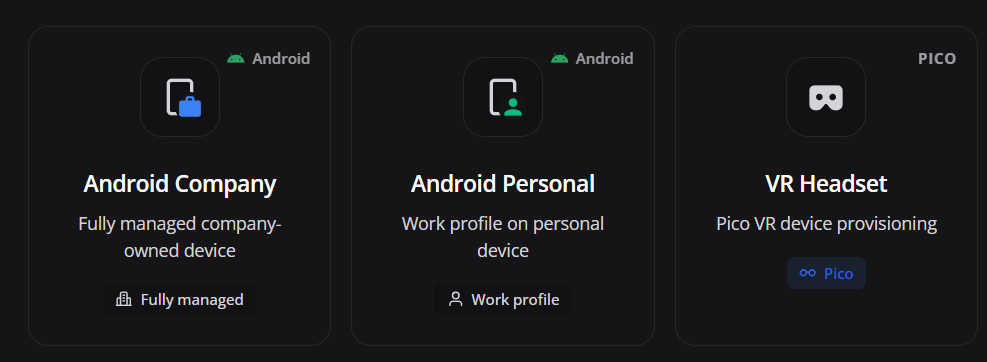
The first step defines the management model and changes every subsequent stage.
¶ Android Company
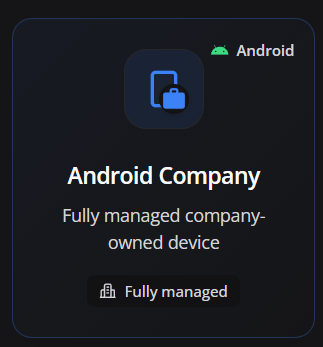
Use Android Company for corporate devices in Fully managed mode. The entire device is managed by the organization and normally must be new or factory reset.
Before resetting a device that was already used, confirm backup, asset-owner authorization, applicable account/FRP handling, battery, connectivity, and the re-enrollment plan. Factory reset removes local data and must only be performed when disposal, policy change, or new provisioning is approved.
¶ Android Personal
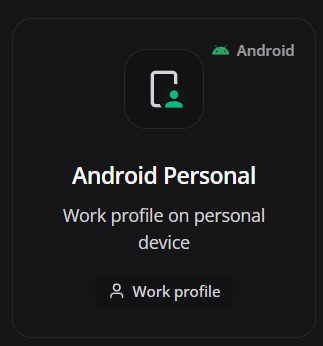
Use Android Personal to create a Work profile on a personal device. Management is limited to the work profile, while the personal area remains separate according to Android Enterprise rules.
¶ VR Headset
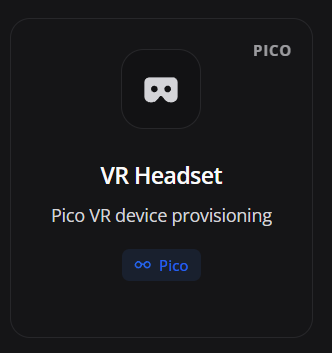
Use VR Headset to prepare Pico headset provisioning through NOPS.
Important: Pico VR headsets can currently be provisioned only through NOPS. Zero-touch and KME are exclusive to compatible Android Company devices and do not apply to VR Headset.
¶ Provision Android Company
¶ Select the policy
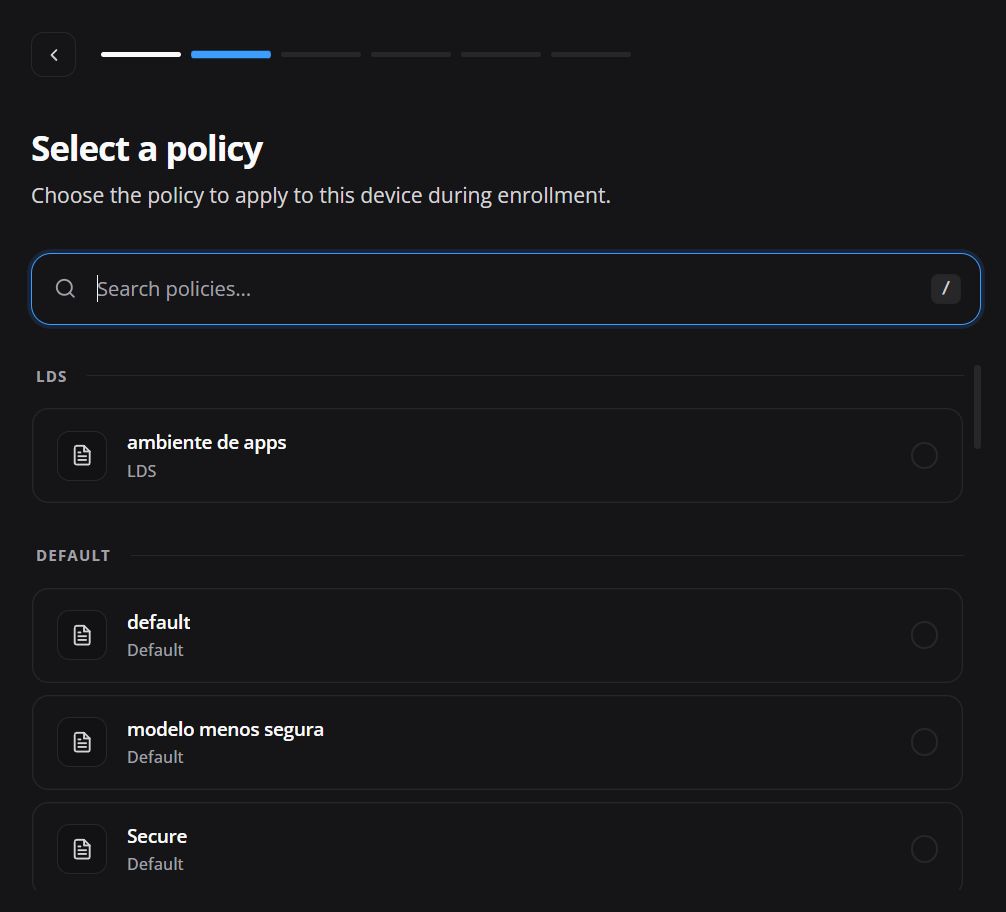
Choose the policy that will be applied during enrollment. Policies can be organized by group, and the search field helps in larger environments.
¶ Selection result
- The policy defines applications, restrictions, launcher, network, and other rules received after enrollment.
- An incompatible policy or one still under review may leave the equipment without the required settings.
- When the wizard is opened from a policy, confirm that it remains selected before continuing.
¶ Set language and time zone
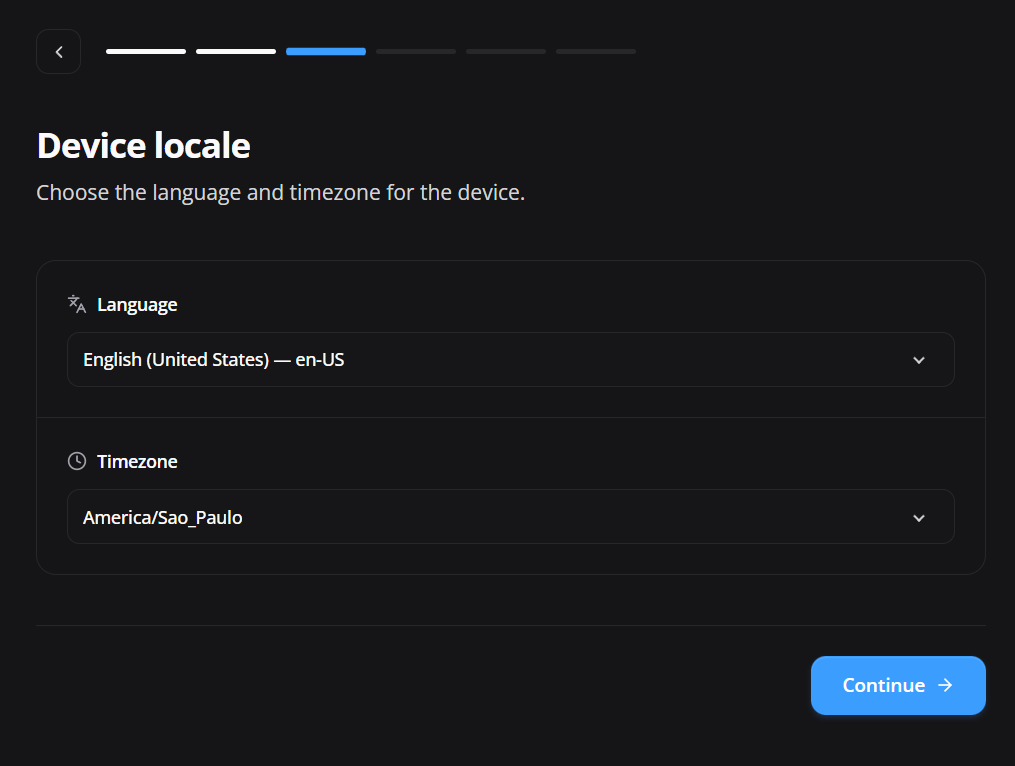
Under Device locale, select the language and time zone used during initial setup.
¶ Selection results
- Language: sets the initial Android language during provisioning.
- Timezone: sets the initial time zone used for date, time, logs, and scheduled routines.
- Confirm the device's operational time zone, not only the location of the administrator generating the enrollment.
¶ Configure Wi-Fi
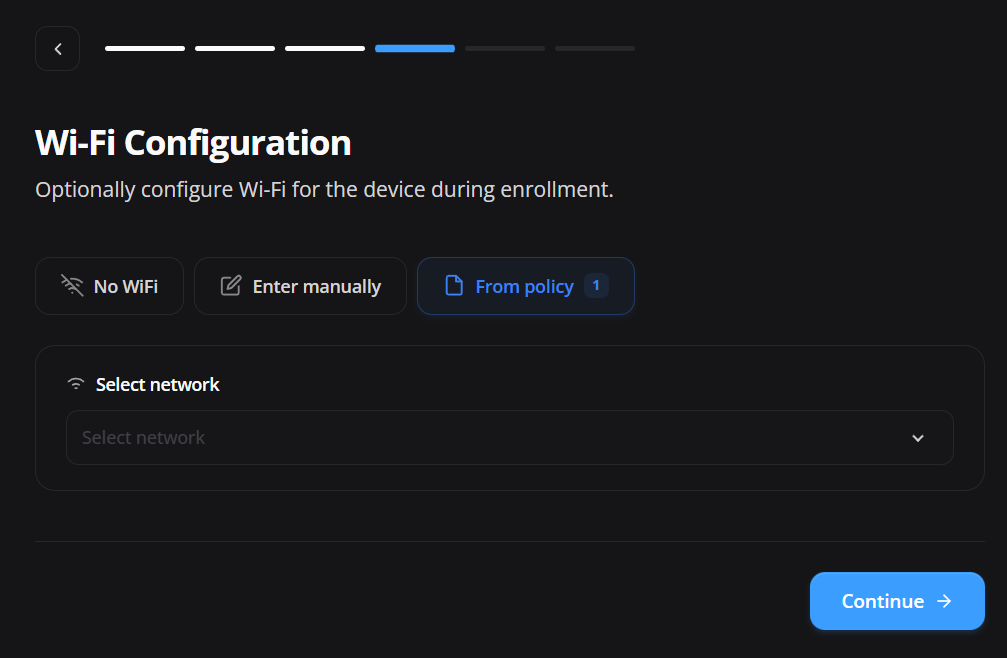
Wi-Fi is optional in the wizard, but the device needs connectivity to download the policy controller, complete enrollment, and receive settings.
Attention: An incorrect Wi-Fi configuration causes provisioning to fail completely. Because the failure usually appears only as a generic error, validate the SSID, security type, password, and network availability at the initial setup location beforehand.
¶ No WiFi
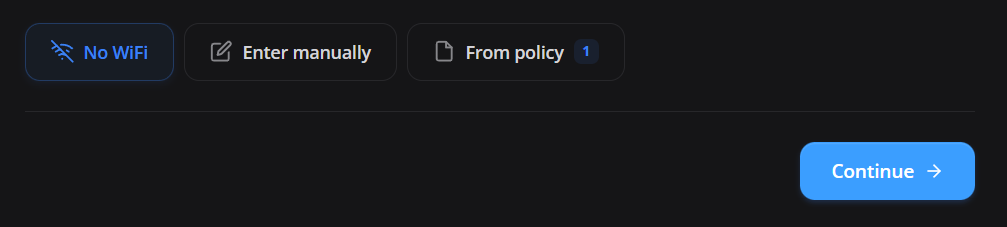
Select No WiFi when the network will be configured directly on the device or provisioning will use mobile data. Make sure another connection method is available before starting.
¶ Enter manually
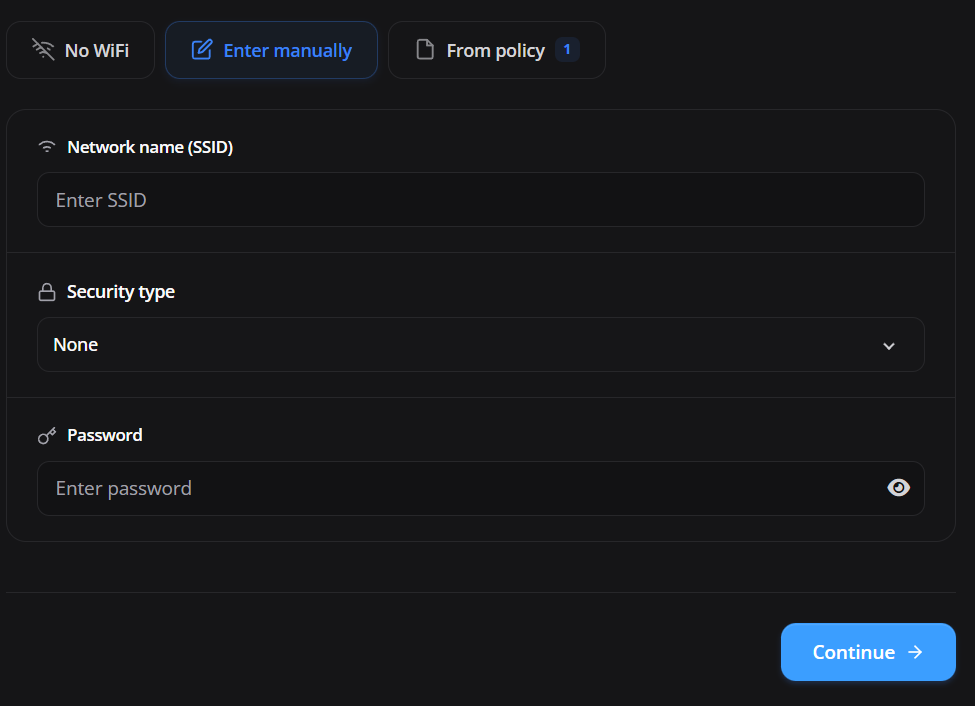
Enter Network name (SSID), Security type, and Password. Review capitalization, security type, and password because an error can prevent the device from reaching the management service.
¶ From policy
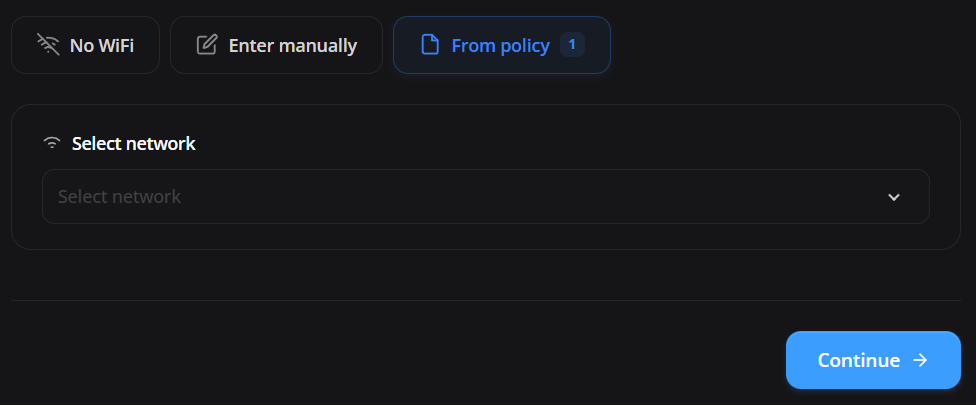
Select From policy to reuse a network available in the chosen policy. Confirm that the network is accessible where the equipment will first be powered on.
¶ Review advanced provisioning
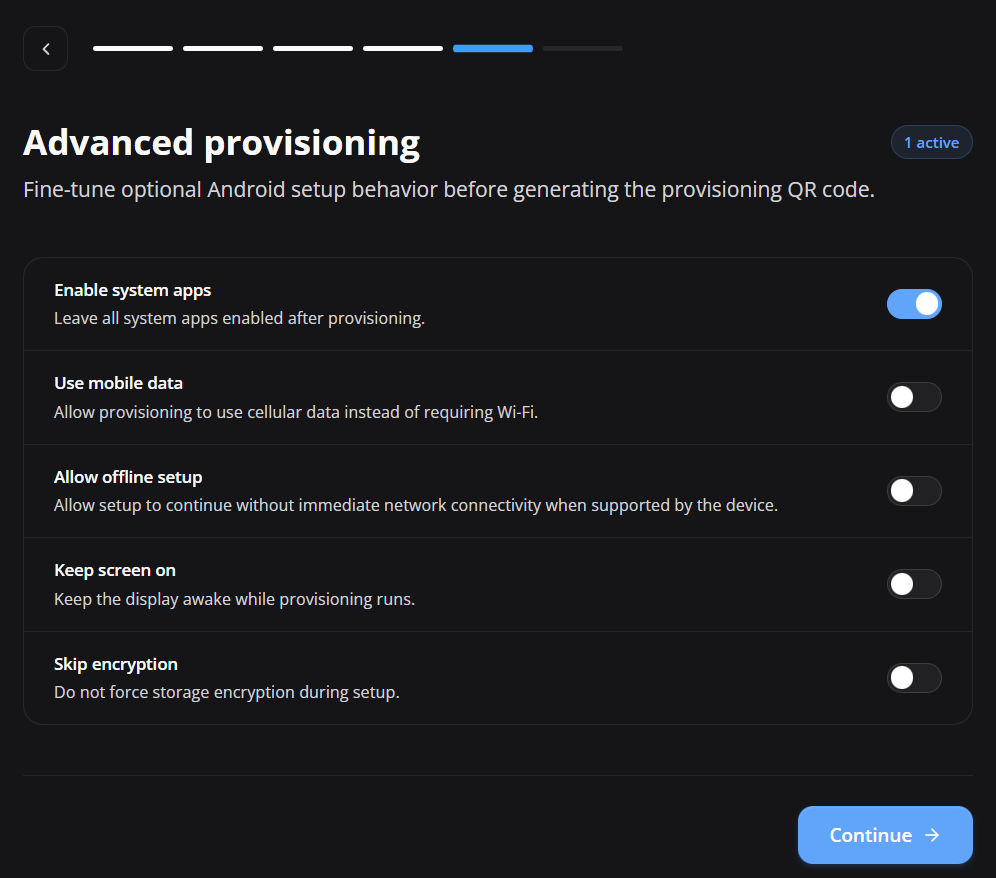
Advanced options adjust initial setup behavior and are embedded in the generated payload for QR code, JSON, or enrollment token.
¶ Option effects
- Enable system apps: keeps system applications enabled after provisioning.
- Use mobile data: allows cellular data instead of requiring Wi-Fi when supported and available.
- Allow offline setup: allows part of setup to continue without immediate connectivity when supported by the device.
- Keep screen on: keeps the display awake while provisioning runs.
- Skip encryption: requests that encryption not be forced by the wizard; use only after formal security and compatibility review.
- Skip education screens: requests skipping Android setup education screens when supported by the device and Android version.
Security: Do not enable Skip encryption merely for convenience. The decision must follow the organization's security policy and device requirements.
¶ Generate the enrollment resource
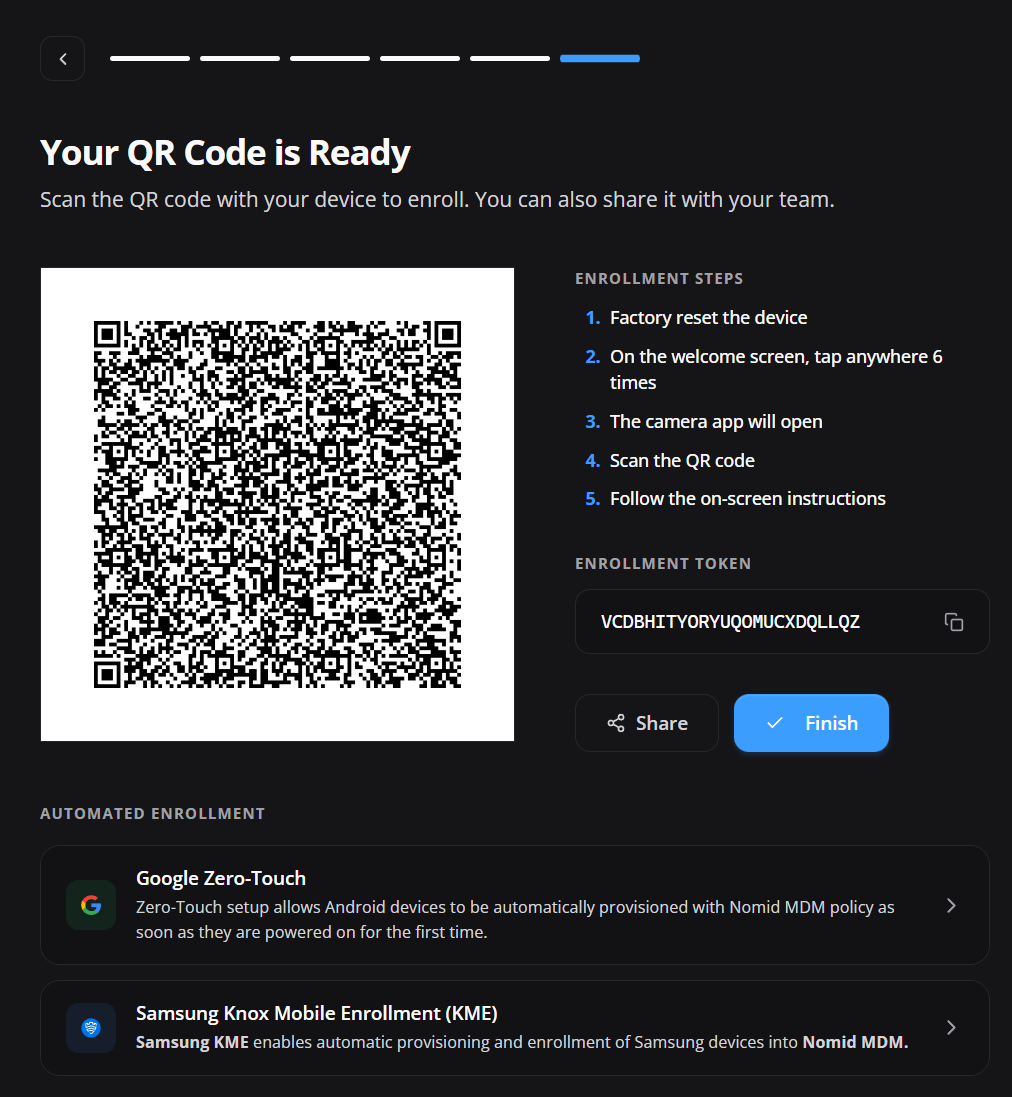
When the wizard is completed, the portal displays the QR code, instructions, token, and automated enrollment options. The values shown below are for demonstration; do not expose credentials generated in production companies.
¶ QR code enrollment
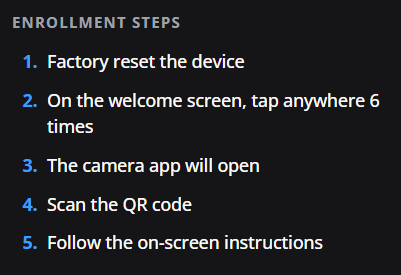
- Factory reset a device that has already been configured.
- On the welcome screen, tap the same area six times to open the QR reader when supported.
- Connect the device to the internet when prompted.
- Scan the QR code generated by the portal.
- Follow the on-screen instructions until enrollment is complete.
¶ Enrollment token
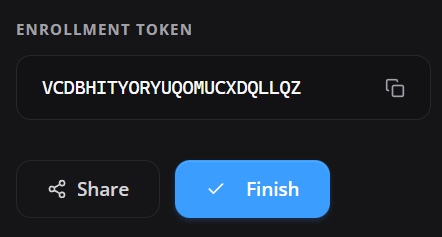
The token is the text alternative to the QR code and is also used in automated enrollment configurations. Use the copy button to prevent typing errors and confirm that it belongs to the selected policy.
¶ Automated enrollment
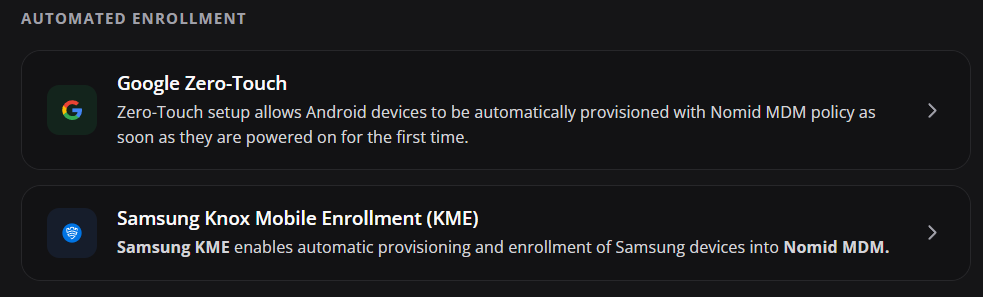
The portal also provides instructions for Google Zero-touch and Samsung Knox Mobile Enrollment (KME). These methods are exclusive to compatible Android Company devices, require prior registration with the manufacturer or reseller service, and require the correct enrollment profile to be assigned. They cannot be used with Pico VR.
Zero-touch and KME are normally evaluated during first setup after a device is powered on new or factory reset. If the device has already completed the setup wizard, plan an authorized reset before testing the automated flow.
¶ Google Zero-touch
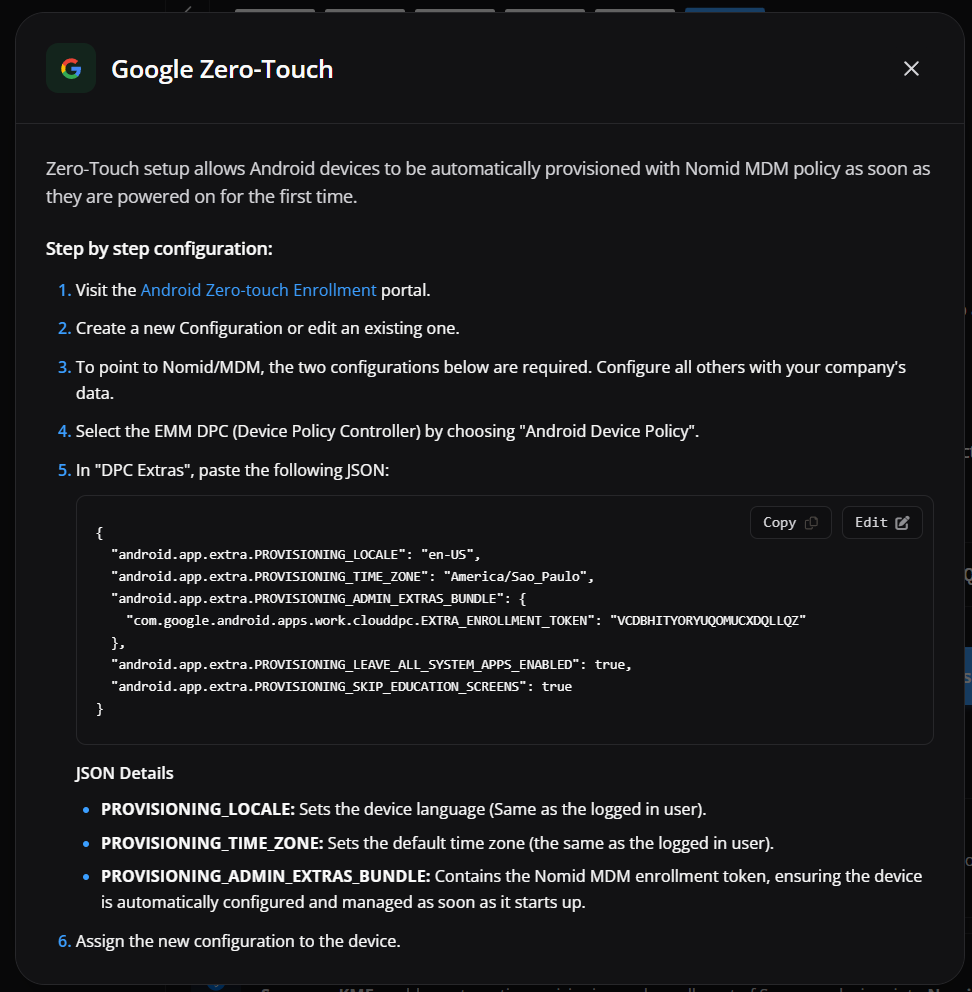
The window shows the DPC, JSON, and provisioning extras required to associate the device with the selected policy. Copy the JSON without changing property names or structure.
For requirements, registration, and configuration assignment, see the Zero-touch guide.
¶ Samsung Knox Mobile Enrollment
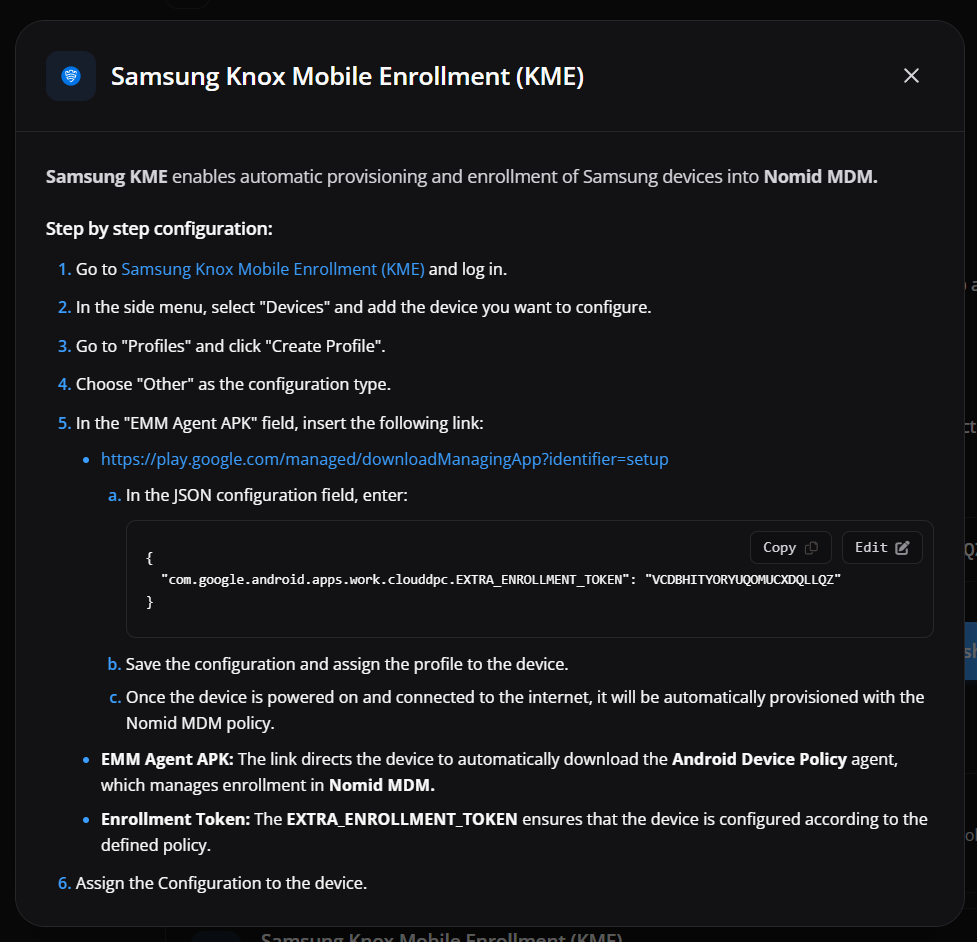
The window shows the EMM agent address and JSON containing the enrollment token. Use these values in the KME profile assigned to the corresponding Samsung equipment.
The JSON and token are enrollment credentials: copy them without changing the structure and store them only in an approved channel. If exposure or improper sharing is suspected, stop sharing them and contact the security owner for the authorized containment and recovery procedure. Generating the material again can reuse a still-valid token; it does not prove revocation or replacement.
For requirements, profiles, and Samsung device assignment, see the Knox Mobile Enrollment guide.
¶ Provision Android Personal
¶ Select the policy
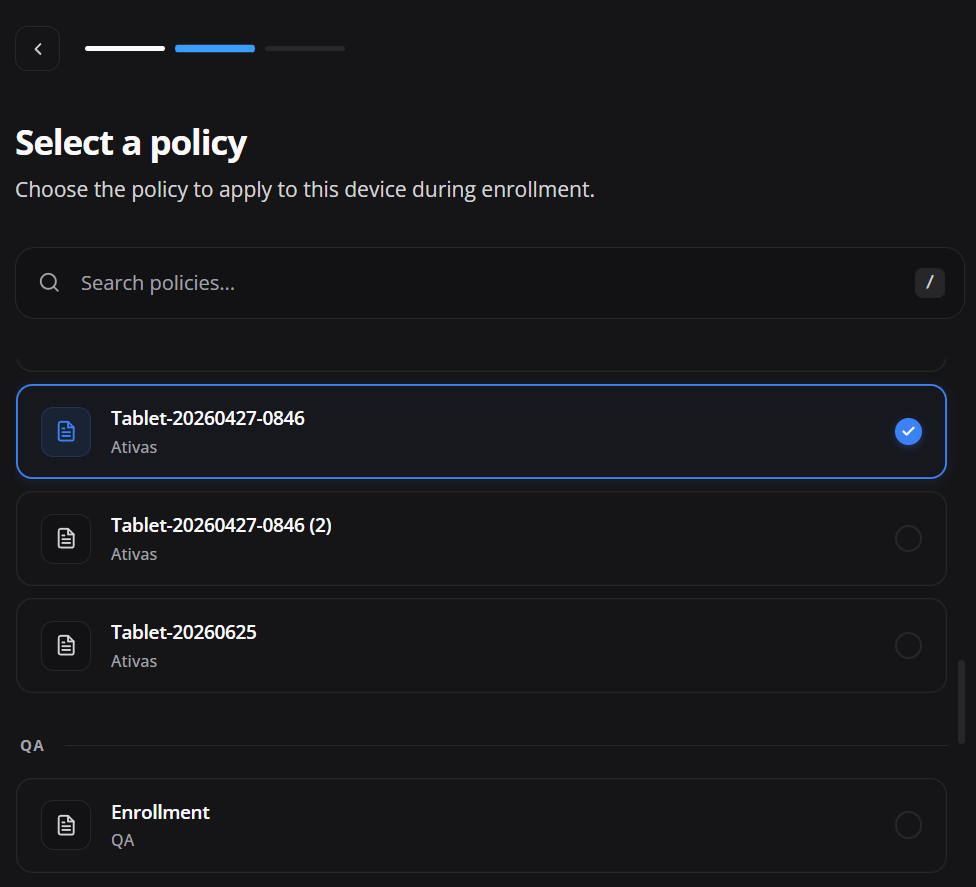
Choose a policy compatible with Work profile. Policies designed only for fully managed equipment may contain resources that do not apply to a work profile.
¶ Share the enrollment
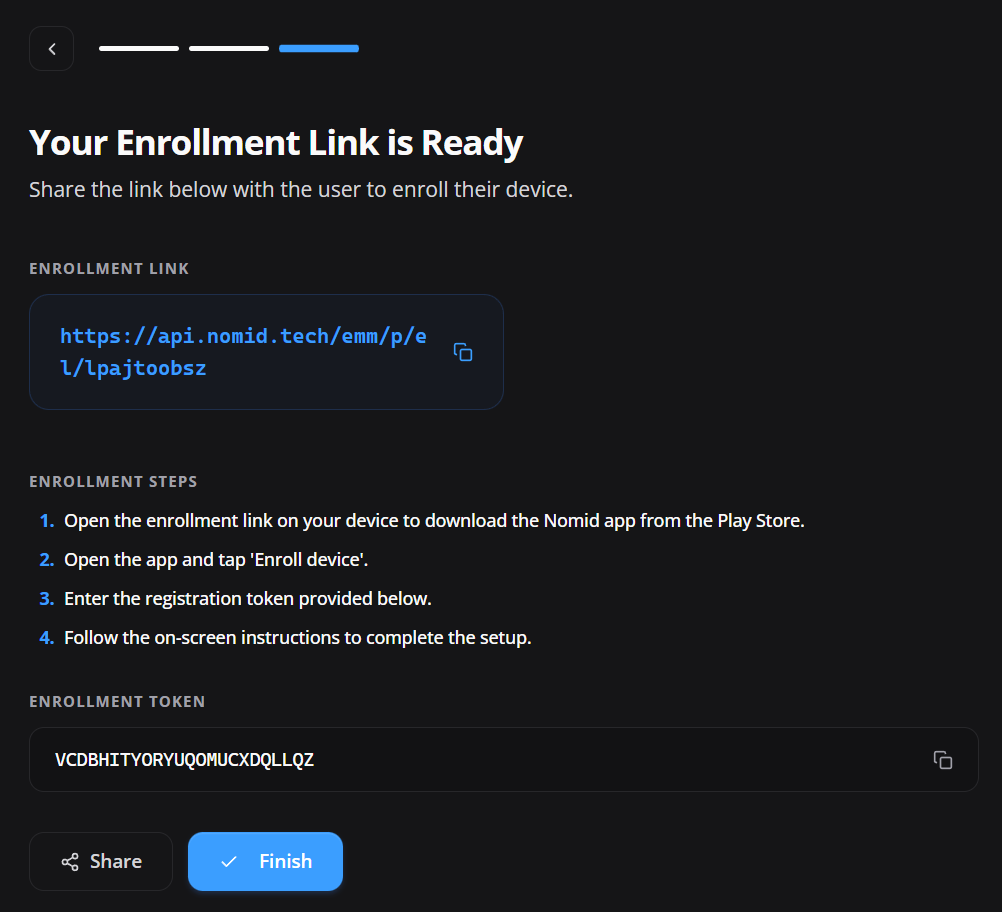
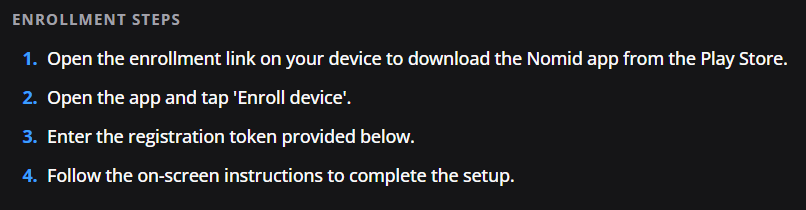
The portal generates an enrollment link and token for the responsible user.
¶ Enrollment link
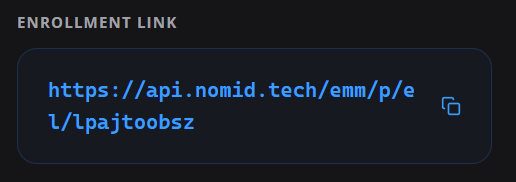
The link directs the user to the flow and application required to create the work profile. Use the copy button and send the complete address.
¶ Enrollment token

The token connects the enrollment attempt to the selected policy. Enter it in the application when requested.
¶ Perform enrollment on the device
- Share the link with the responsible user. The address must be opened on the Android device that will receive the work profile. Avoid retyping the link or forwarding it to other users because it belongs to this enrollment attempt.
- Open the link and install the Nomid application. The link opens the Play Store. Install the indicated application, or update it if it is already present, and then open it on the same device. Keep a stable connection throughout the process.
- Start registration. In the application, tap Enroll device. This action starts associating the device with the company and prepares work profile creation.
- Enter the registration token. Copy the token displayed in the portal and enter it exactly as generated, without leading or trailing spaces. Before continuing, confirm that the token belongs to the correct company and policy.
- Complete the Android screens. Follow the system instructions and authorize work profile creation and the requested permissions. The wording may vary by Android version and manufacturer.
- Wait for configuration to finish. Do not close the application, restart the device, or interrupt the internet connection while Android creates the profile, applies the policy, and starts installing corporate applications.
- Validate the work profile. Confirm that corporate applications display the briefcase icon and remain separate from personal applications. Corporate policy should operate only within the expected work scope.
¶ Provision a VR Headset
¶ Prepare NOPS
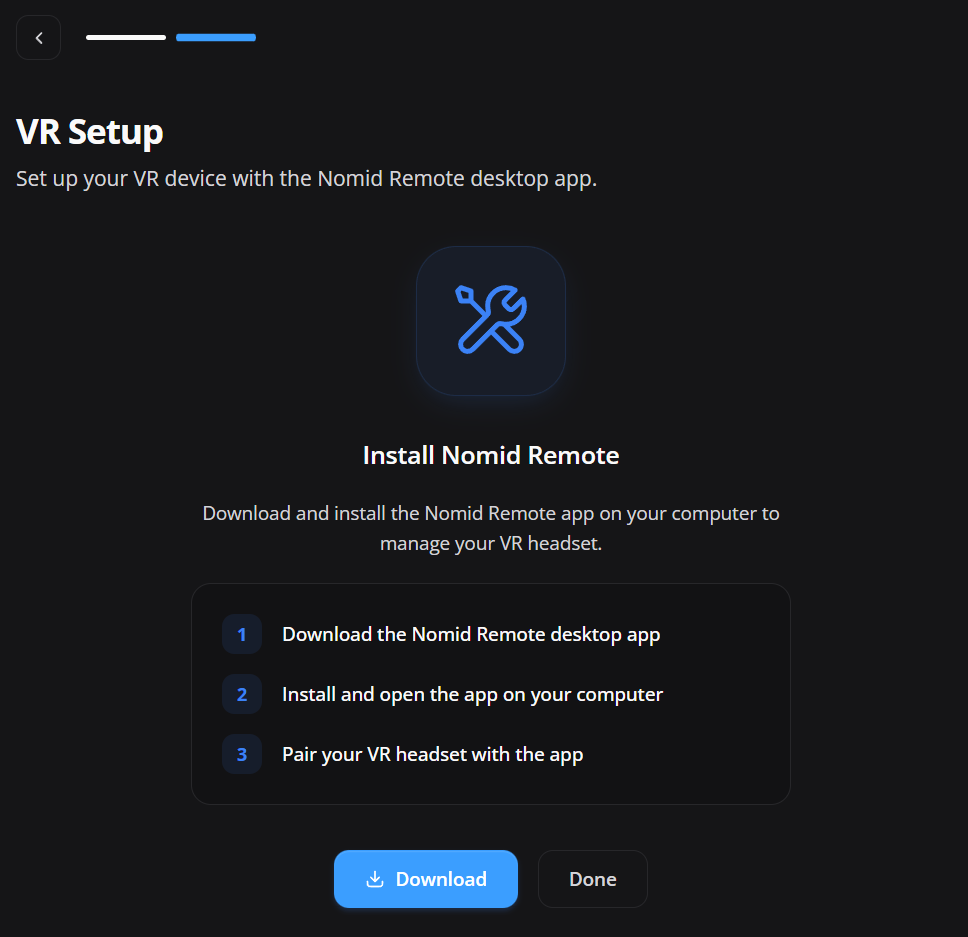
Pico VR provisioning is performed exclusively through NOPS.
Attention: The screenshot above still mentions Nomid Remote, but that label is outdated. Do not use Nomid Remote to provision Pico VR; use NOPS.
- Install and open the approved NOPS version on the provisioning workstation.
- Connect the headset and select the provisioning flow indicated by NOPS.
- Complete the steps shown by NOPS.
- Confirm in the portal that the device appears in the fleet with the correct policy.
The detailed NOPS manual will be maintained under this wiki's Provisioning directory.
¶ Validate enrollment
- Confirm that the device appears under Devices in the correct company.
- Check status, applied policy, group, management mode, and last synchronization.
- Confirm that required applications have started installing.
- Validate network, launcher, restrictions, and essential policy settings.
- For Android Personal, confirm creation of the work profile and separation of corporate applications.
- For VR, confirm that NOPS provisioning completed and that the headset communicates with the portal.
¶ Common issues
¶ The policy does not appear
- Confirm that it belongs to the selected device type.
- Check group, company, publication status, and user permissions.
- Use search and clear filters that may hide the policy.
¶ Provisioning fails with a generic error
- Treat Wi-Fi configuration as the first suspect because an incorrect SSID, security type, or password stops provisioning completely and normally produces only a generic error.
- Confirm that the policy network is available at the enrollment location.
- Check captive portal, proxy, DNS filtering, and access to Android Enterprise services.
If the device recognizes the organization and consistently fails during
Getting ready for work setup after a factory reset, multiple newly generated
QR codes, a minimal policy, and both Wi-Fi and hotspot tests, stop repeating the
basic network checklist. The failure is likely occurring during Android
Enterprise policy-controller handoff and requires support investigation.
Record the approximate attempt time and time zone, policy name, enrollment
profile, Android version/build, device model, and the exact on-screen message.
The portal may have no device record or exact error when the failure happens
before the first successful check-in. Support must use backend/API evidence; do
not claim that company logs were checked unless an authorized diagnostic actually
returned a result.
¶ The link or token does not work
- For a copy error, check the transcription through a secure channel. If exposure or misuse is suspected, contact the security owner; do not test the token or assume that generating it again invalidates the previous one.
- Confirm that the link and token belong to the same attempt and correct company.
- Do not publish the value when requesting support; provide only the error message and attempt time.
¶ Zero-touch or KME does not start
- Confirm that the device identifier was registered by the manufacturer or reseller.
- Check that the correct configuration is assigned to the device in the external portal.
- On previously configured devices, the automated profile is normally evaluated on the next eligible startup after a factory reset.
¶ NOPS does not complete headset provisioning
- Confirm that the approved NOPS version is installed and open on the correct workstation.
- Check connectivity, cable/network, local permissions, and headset compatibility.
- Restart NOPS and repeat the flow without creating duplicate registrations.
¶ Enrollment credential security
- Treat QR codes, links, and tokens as temporary provisioning secrets.
- Share them through an authorized channel and only with the responsible person.
- Do not reuse screenshots containing production credentials in public materials.
- Treat suspected exposure as an incident. Follow the authorized containment and recovery procedure; generating the material again does not prove token revocation or replacement.
- After enrollment, validate the device and finish the flow in the portal.