¶ Samsung Device Provisioning Guide via Knox Mobile Enrollment (KME) with Nomid MDM
| Application or layer: | Version | Last update date |
|---|---|---|
| Document | V1.0.0 | 06/06/2025 |
| Language | en_US | - |
¶ Introduction
Samsung Knox Mobile Enrollment (KME) is a Samsung service designed to facilitate the registration and initial setup of the brand's Android devices, especially in corporate environments. Through KME, it's possible to pre-define a management profile that will be automatically applied to the device as soon as it's turned on for the first time (or after a factory reset) and connected to the internet.
This process allows the device to be automatically associated with an enterprise mobility management (MDM) solution, such as Nomid MDM, without the need for manual intervention from the user or IT team during the initial setup.
This document aims to present, in detail, how KME works, the necessary steps to create and apply a provisioning profile, the available methods for associating devices, and how to use the QR Code to facilitate activation. The material is intended for technical teams who wish to understand the end-to-end process and ensure a correct and efficient implementation of corporate management on Samsung devices.
¶ Step 1: Creating a Provisioning Profile in KME
¶ Step-by-step
- Access the Knox portal: https://portal.samsungknox.com. You need to have a Samsung Knox account with KME activated.
- Go to "Knox Mobile Enrollment" > "Profiles".
- This is the section where you will create and manage device provisioning profiles.
- Click "Create profile" to start creating the new profile.
- Choose "Android Enterprise" type.
- This configures the device as fully managed (Device Owner), ideal for corporate use.
¶ Basic Profile Data
- Profile Name: Profile identifier name. Use something descriptive like "Nomid Android - Sales Team".
- Company Name: Company name that will be displayed on the device during enrollment.
- Support Email/Phone: Contact details for support, which will be presented to the user if there are issues.
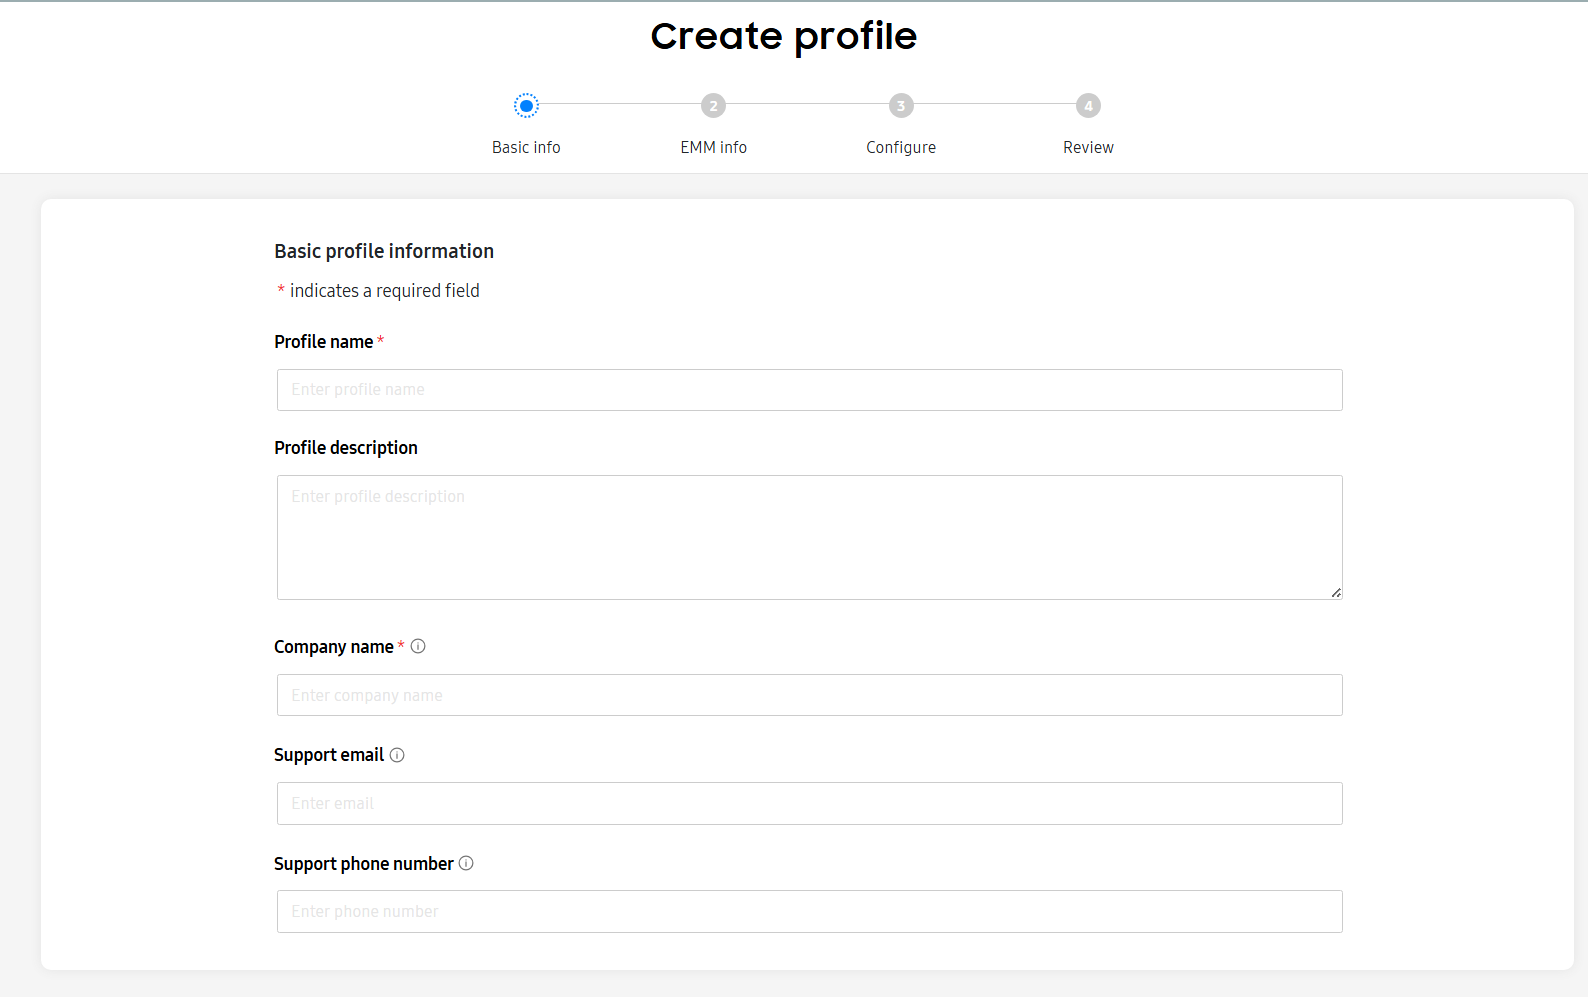
Profile creation screen with fields filled in
¶ MDM Configuration
- Choose MDM: Select "Nomid MDM" if listed. Otherwise, select "Other".
- APK: Provide the public link to the Nomid MDM agent APK. If using the default Android Enterprise agent, the default URL is provided by the system itself.
- MDM Server URI: Leave blank, unless Nomid provides a custom URI.

APK and URI configuration screen
¶ JSON Data (Enrollment Token)
Enter the JSON provided by Nomid, which contains the enrollment token:
{

"com.google.android.apps.work.clouddpc.EXTRA_ENROLLMENT_TOKEN": "ABCDEF123"

}
This token links the device to your organization in Nomid MDM.
JSON input screen
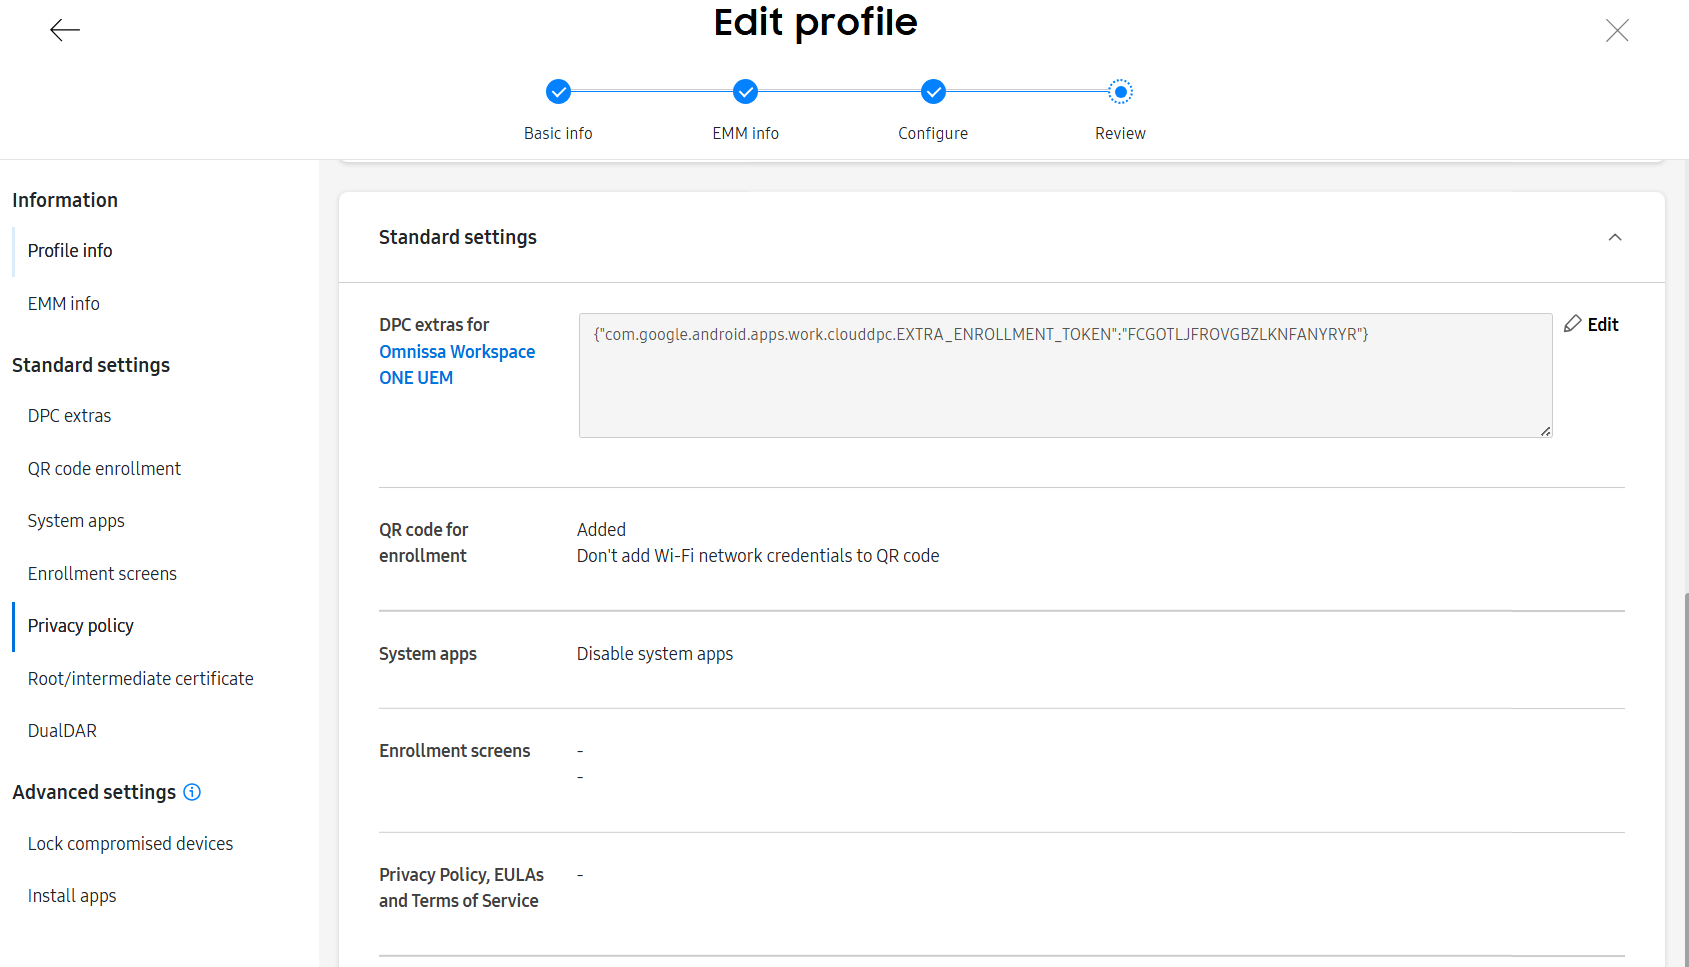
¶ QR Code Configuration
- Click "Add QR Code".
- Check "Also allow QR enrollment for devices not uploaded" to allow enrollment of devices not purchased from official resellers.
- Optionally, add Wi-Fi network details (SSID, security, password) to facilitate automatic connection.

QR Code configuration screen
¶ Finalizing
- Click "Create" to save the profile.
- Make a note of the profile name to link it to devices later.
¶ Step 2: Generating and Using the QR Code
- Access the created profile and locate the "QR Code" option.
- Download or print the QR Code.
This code contains:
- The KME profile identifier
- The enrollment token (JSON)
- Wi-Fi settings (if provided)
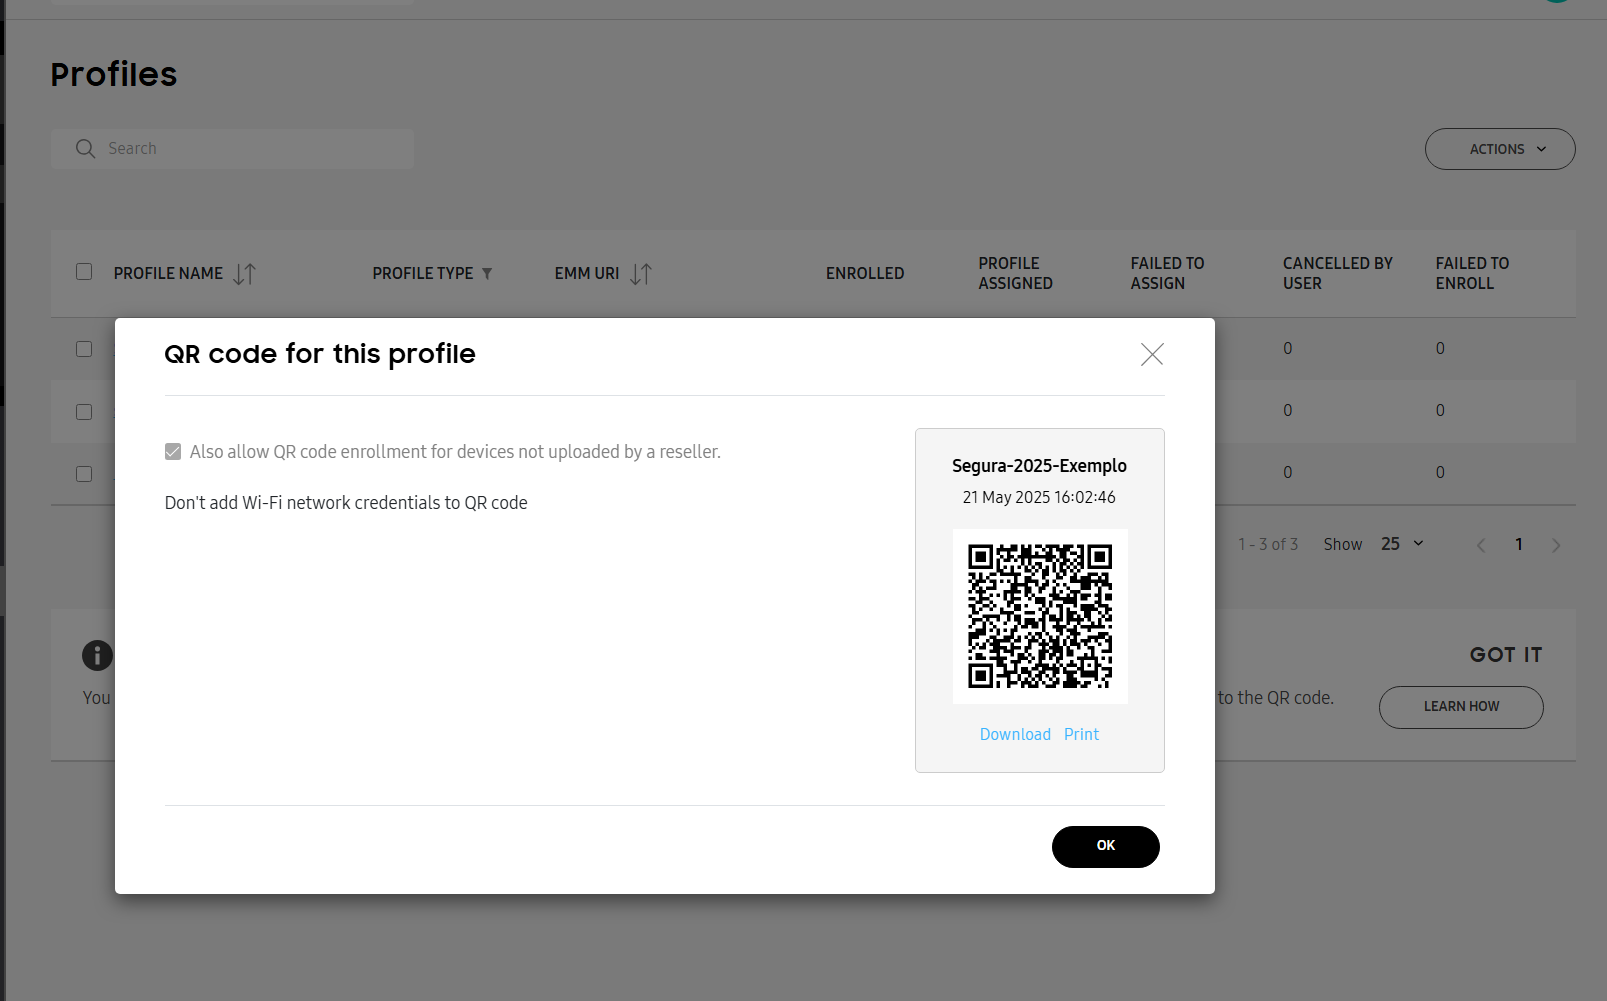
QR Code generated in the portal
Use this QR to enroll devices directly, even if they are not pre-loaded in KME.
¶ Step 3: Adding Devices to KME
¶ A) Via authorized reseller
- Devices purchased from authorized Samsung partners automatically appear in the KME console.
¶ B) Manual methods
- Knox Deployment App (KDA): Allows individual device registration via NFC or Wi-Fi Direct. Suitable for a small number of devices.
- QR Code: Factory-reset devices can be enrolled by scanning the generated QR.
- Upload via CSV: Spreadsheets with IMEI/serial numbers can be bulk imported to register devices.
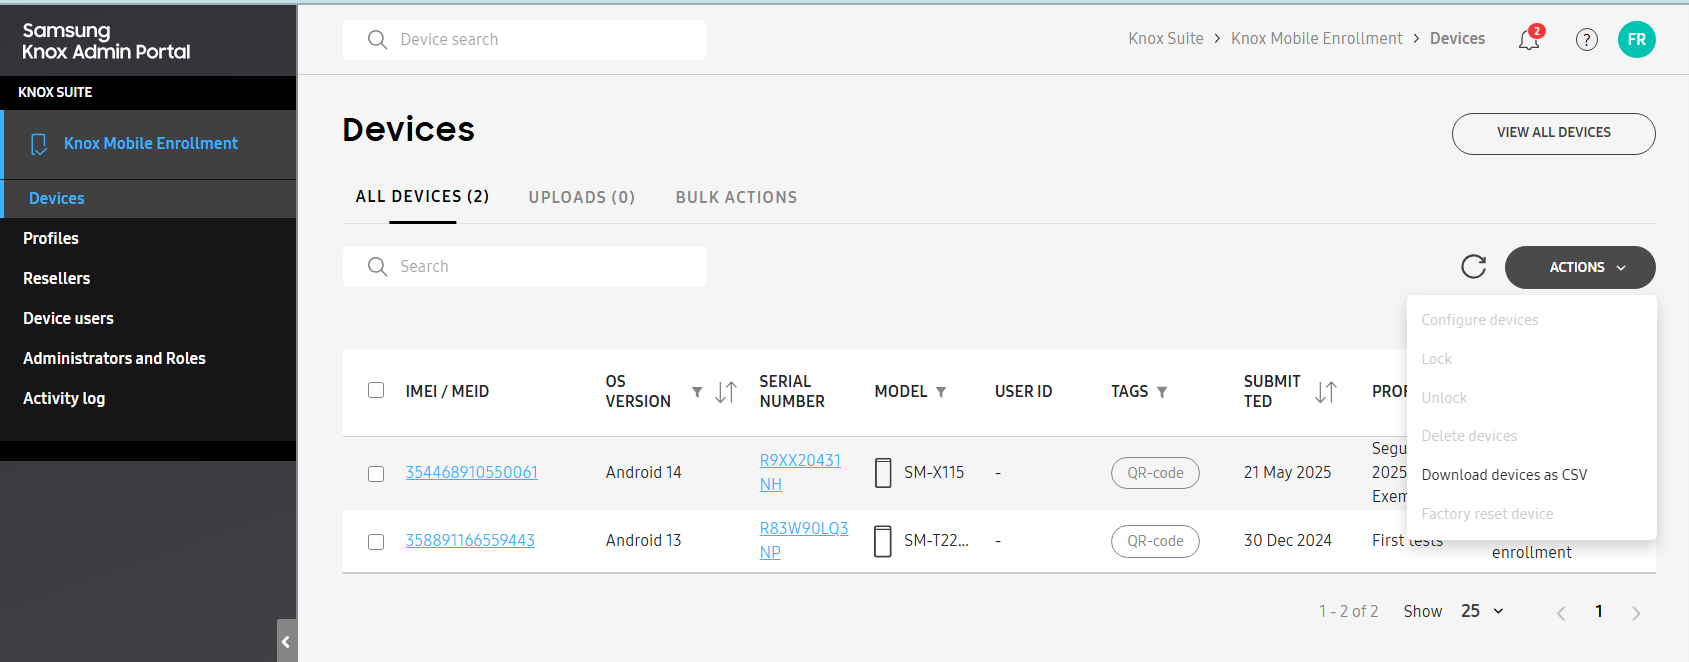
Portal screen with device list
¶ Step 4: Assigning Profile to Devices
- Access the "Devices" tab in the KME portal.
- Select the desired devices.
- Click on "Assign profile" and select the created profile.
[Insert image here: Profile assignment screen]
Note: Devices enrolled via QR Code with permission for non-pre-registered devices automatically receive the profile.
¶ Step 5: Device Provisioning on Samsung Device
- Turn on the device and select the language.
- On the welcome screen, draw the '+' sign with your finger to activate the QR reader.
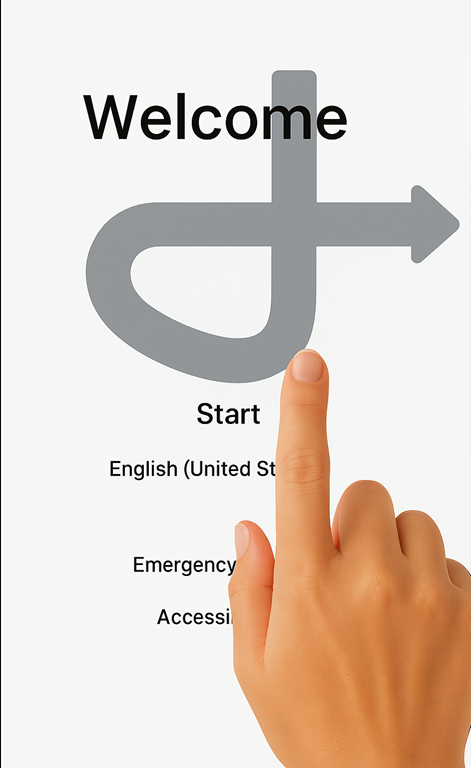
- Point the camera at the QR Code.
- Connect to the internet (Wi-Fi or SIM card with data).
- The MDM app is automatically downloaded and installed.
- The device enrolls in Nomid MDM, with or without user interaction (as configured).
¶ Step 6: Integration with Nomid MDM
- Obtain the enrollment token from the Nomid console (Android Enterprise section).
- Confirm that the enrollment type is "Device Owner".
- Verify that the correct APK is used (Android standard or Nomid exclusive).
If necessary, consult Nomid technical support to confirm the data.
¶ Step 7: Validation and Troubleshooting
¶ Common issues
- Device not appearing in Nomid:
- Check if the token is correct and still valid
- Authentication error:
- Confirm login and password (if required) or regenerate the token
- Device ignores KME:
- Check if a complete factory reset was performed and if the device is online
- QR scanning error:
- Incorrect generation or unchecked permissions in the profile
¶ Conclusion
This guide provides a detailed step-by-step process for automatically configuring Samsung devices with Nomid MDM via KME.
Benefits include:
- Reduced manual effort
- Ensured compliance and security
- Agility in the activation process
Reference: Samsung Knox Documentation